Blogmas 2020 Day 3
On Blogmas day one you saw me put together my very nontraditional Christmas tree, so today I thought I’d show something more conventional.
I live for a touch of luxury, especially during the holidays. When I searched luxury Christmas décor, I didn’t find a lot of reds and greens or use of color at all. Instead I found décor on the more monochromatic, metallic side. So for our family tree, we chose silver, and I decided to make wreaths to match!
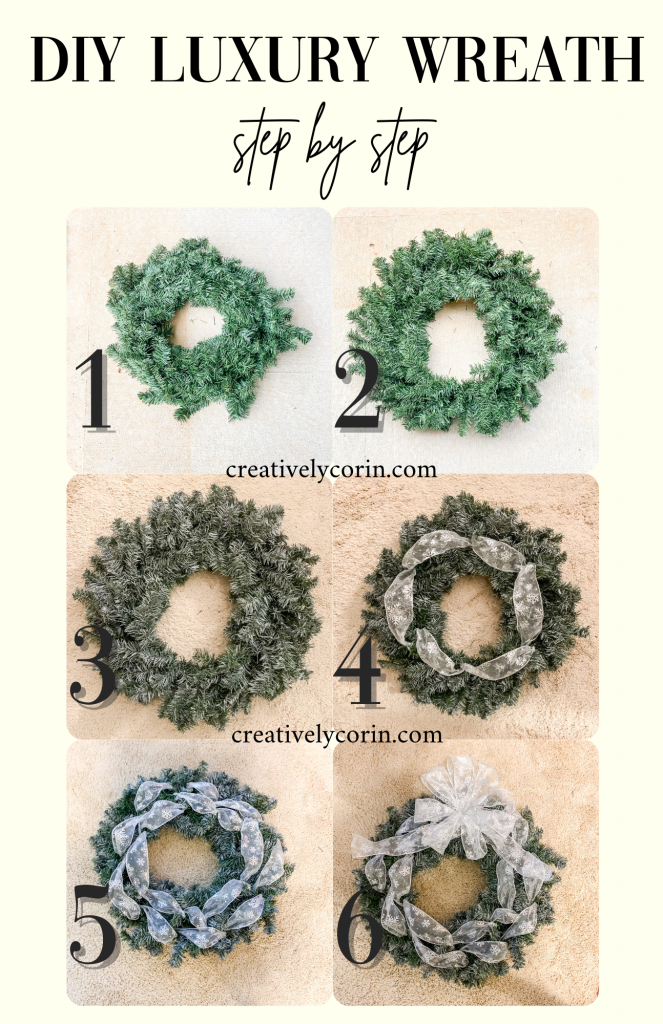
Making the wreaths was actually a very simple process! In about 6 steps and probably a total of 60 minutes, my wreath was complete.

Steps
- I purchased a $5.99 24″ wreath from Michael’s. I recommend measuring the space you are hanging your wreath beforehand to make sure you’re optimizing all your space without overcrowding it.
- Just like with the branches of my Christmas tree, I started off by separating and fluffing. This made the wreath appear fuller and made sure that when I moved on to the next step, every branch would be covered.
- Next, I frosted the wreath with silver glitter spray paint. To my surprise, it took the entire $7.99 can to give the wreath even a light dusting. You can definitely purchase a pre-frosted wreath, but it will be more expensive than a can of paint. It didn’t take much time to spray paint this plain one, and it was lots of fun!
- After the paint had dried, I moved on to ribbon. Pro Tip: It is important to use wired ribbon so your loops and bows hold their shape. The glitter snowflake ribbon I used was 2.5 inches wide, and came in a 10 yard spool for under $5! Talk about a luxury look on a budget! To form my loops, I first anchored the ribbon to a branch on the wreath by tying it around. Then, I made a rainbow shape, and wrapped the next branch around the ribbon to secure it. I repeated this all the way around the wreath, and then snipped off the excess ribbon.
- For the next step, I simply repeated everything I did in step 4 on the outermost branches of the wreath. I love the double halo effect it created!
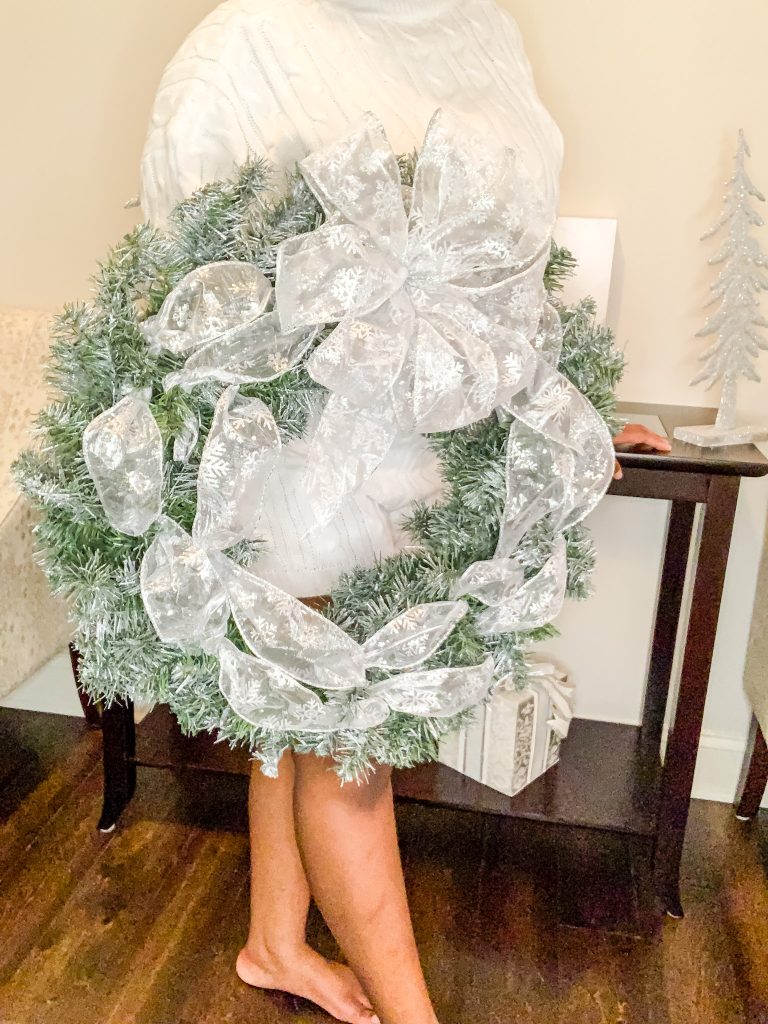
- Finally, I secured the bow to the top of the wreath, and it was complete!

Here’s the finished wreath, which I hung in my foyer! If you’d like to see how I created the bow for the top, subscribe for access to the video on my freebies page!
Lavishly,


